Battle of Shiloh; April 6-7, 1862 Home
HPS Shiloh: Scenario 144
86 Turns
USA 67,619 – CSA 39,874
Shiloh National Battlefield – Morning Fog on Wood Field
(Historical) After the fall of Forts Henry and Donelson, Confederate General A.S. Johnston was determined to assume the offensive. He calculated that a sudden blow at the enemy, in position under the command of Major General Grant on the west bank of the Tennessee River, would severely damage the invading army and force it out of western Tennessee. Time was running out. If these plans are not implemented soon, Grant's army would be combined with that of Major General D.C. Buell, already on the march from Nashville via Columbia. You must act quickly and decisively to claim victory! (To simulate the effects of surprise on the Union front ranks, the front rank will start disrupted. Also, this scenario will not allow players to build breastworks. This restriction is intended to prevent the Union player from gaining an unhistorical advantage during the early turns of the game.)
A Note on Average Quality (AQ) Used Below:
The calculation used to determine this is simple. An “A” regiment would receive five points, a “B” regiment four points and so on down to one point for an “E” and zero points for an “F.” You can then add up the numerical totals for a brigade and divide the total number by the number of regiments to get the Average Quality. For example – a brigade of five regiments with two “B’s” and three “C’s” would have a total of seventeen points (4+4+3+3+3=17), this number is then divided by the number of regiments (17/5=3.4) to get the Average Quality of 3.4 out of 5 for that brigade.
General Notes on the Forces
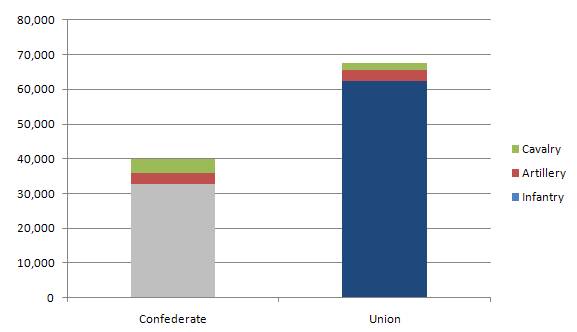
Confederates: 32,852 infantry, 2,925 artillerymen (117 cannon), and 4,097 cavalrymen
Union: 62,250 infantry, 3,225 artillerymen (129 cannon), 2,144 cavalrymen
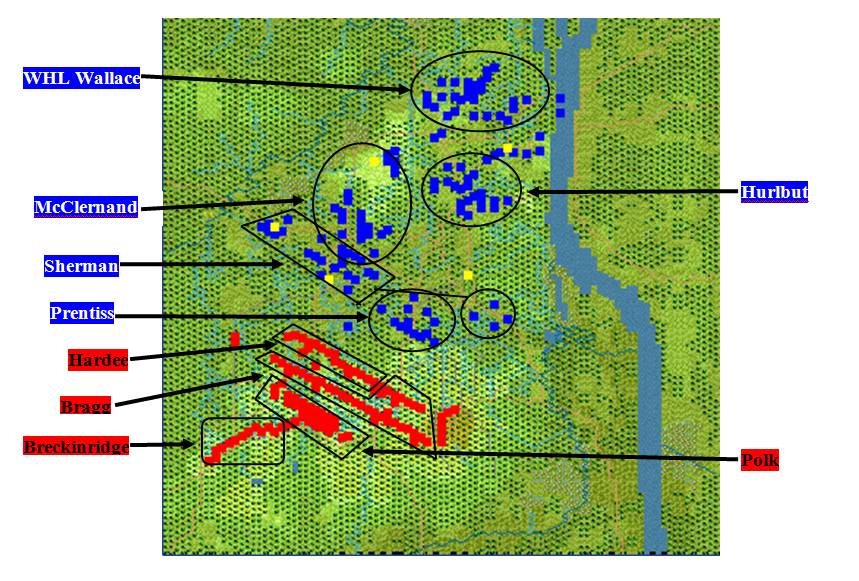
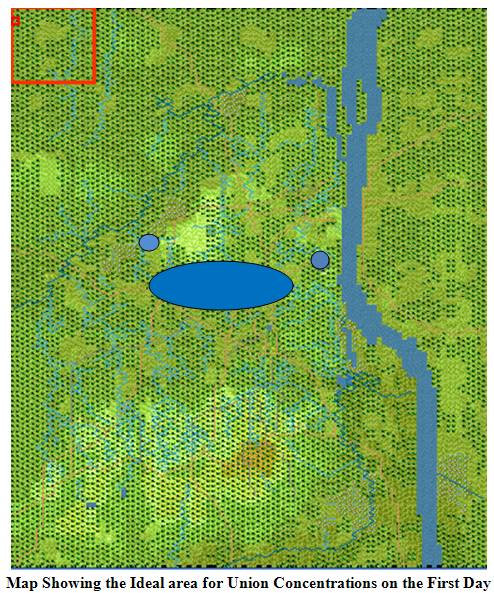
Starting Locations on the Map
The Map below shows the proximity of all major starting forces on the field.
Reinforcements by Time, Numbers, and Location
Knowing where your enemy is coming from is often critical in any scenario and this should never be overlooked. It may not seem “fair” to have such information at your fingertips but I always assume they know when my men are coming, so I should know when theirs are.
Confederate Reinforcements
The Confederates receive only receive a single regiment during the battle as reinforcements. This regiment is the 731-man 47th Tennessee regiment arriving at Hex (0, 77).
Union Reinforcements
Grant’s Army will begin the battle with all but one of its divisions on the battlefield. This division, Lew Wallace’s, will arrive at 5:40 PM on the 6th at Hex (21, 0). Wallace’s Division will arrive with over 6,500 men and will move south along the Crump’s Landing Road to join the rest of Grant’s Army. Throughout the first day a handful of other unattached regiments will arrive at Pittsburg Landing to fill out Grant’s force. Buell’s Army will begin to arrive at 5 PM on the 6th at Pittsburg Landing. Nelson’s Division will be the first to arrive, followed by Crittenden, McCook, and Wood lastly. Union brigades will continue to arrive throughout the night of the 6th and through the 7th totaling over 21,000 men.
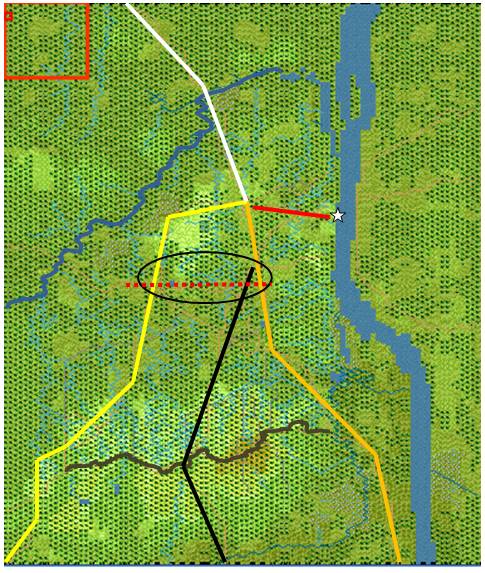
Notes on the Battlefield
The Battlefield of Shiloh has a number of geographic features that affect the overall strategy of both sides during the Battle of Shiloh. First, the Tennessee River flows along the eastern side of the battlefield and creates a natural barrier on that part of the battlefield. The Snake and Owl Creeks create another natural barrier to movement along the northern and northwestern parts of the battlefield (these creeks are marked by a bold dark blue line). These barriers funnel all of the Confederates straight to Pittsburg Landing (marked by a white star). To the south of the battlefield is the Lick Creek Ridge and Bark Road. The ridge line is a natural defensive position (if necessary) and the road is the most secure form of movement for Confederates moving east-west at the start of the scenario (this road is marked by a brown bold line). There are three major north-south roads on the battlefield: the Hamburg and Savannah Road (Orange line), the Corinth and Pittsburg Road (Yellow line), and the Eastern Corinth Road (Black line). All three of these roads lead to the area directly west of Pittsburg Landing where they all intersect with one another. From this point a single road runs north, the Crump’s Landing Road (White line), and a road running east, the Pittsburg Landing Road (dark red line). The main part of the battlefield in contention will be the critical east-west Corinth Road which bisects all three main north-south roads. The area around the Corinth Road should be held, or taken, at all costs by both sides during the battle. For both forces it is the quickest way to shift troops to either flank during the first day of the battle. This area (historically it includes the Hornet’s Nest, Sunken Road, Bloody Pond, Woolf Field, and the Cotton Field) is circled while the road is marked by a dashed red line.
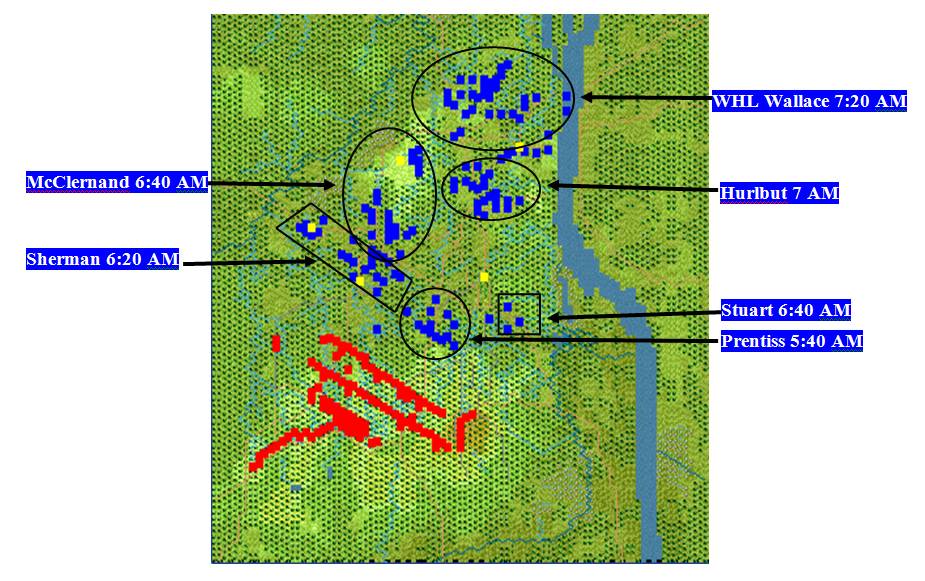
Fixed Units in the Scenario
This scenario forces the Union commander to deal with an army that begins the battle almost completely fixed in place. The Confederates will start nearly completely free to move at will against the Union army. The map below shows the approximate release times of the Union divisions and/or brigades.
Large Scale Union and Confederate Options Applicable in Most Games Played
This section will cover just two of the early possible mistakes/scenarios/movements that may occur in any given game. I can only predict what will occur given the tendencies of commanders to follow the historical patterns at the start of a battle or from what I have personally experienced in playing this scenario. These options will be towards the beginning of the scenario as most battles can be determined by who makes the fewest mistakes at the start.
Confederate Offensive Strategy
Historically, Johnston and Beauregard tried to attack along a ¾ mile front that overextended their lines. When heavy resistance was met on either flank they shifted men from the second and third lines straight ahead to meet it. This caused immeasurable confusion and command disruption throughout the entire battle. Gen. Cleburne at one point could rally no more than a few dozen men from his brigade in the woods – the rest had simply been lost in the maelstrom of battle. Because the Confederates attacked along such a wide front they were unable to deliver a single sledgehammer blow at any one place along the Union line. This may have cost them the victory in the end.
The Confederate commander in this scenario should not repeat the same mistake! The Confederate Army starts off spread along a wide front. By moving the entire front line forward (III Corps and Gladden’s Brigade), along with the remainder of Withers’s Division, the Confederate commander can force the entire Union front to come alive with action. The first wave will then have a force of about 14,000 men moving forward to meet Grant. This will lock the Union forces into place at many points. Use the cavalry to threaten the right flank of the Union army and to keep Hurlbut’s Division close to the landing after they are released. With the rest of II Corps, and the entire I and Reserve Corps, move your men and cannon straight down the Corinth and Pittsburg Road. Use your overwhelming force to drive Sherman and McClernand back and then bring up your cannon to bombard any defensive line being established by WHL Wallace in the rear. With luck you may be able to steamroll WHL Wallace and capture the Landing before the divisions of Buell begin to arrive in the evening. Move quickly and don’t stop to allow the Union player to catch his breath and you may have a major victory by sundown!
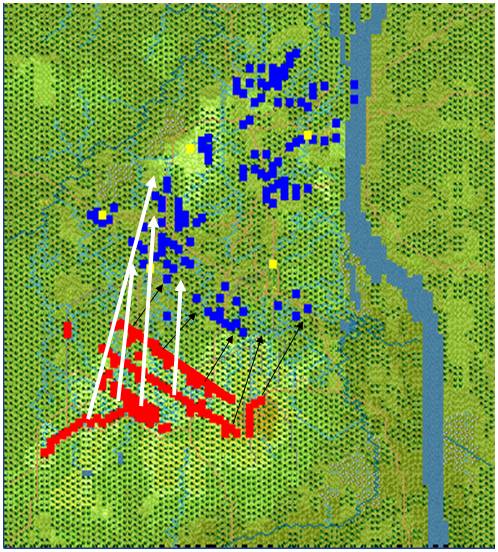
Confederate Attack
The first wave’s movements are marked in black, the second wave (main attack) is marked in white.
Union Defensive Strategy
There are two main Union defensive strategies on the first day of battle. The first option is contesting all of the ground from Rhea Field to the Landing itself. This option means bringing forward WHL Wallace, Hurlbut, and McClernand to reinforce Sherman and Prentiss. The advantages to this option are easily discernable. By doing this the Union commander will keep the Rebel army as far from the Landing as possible and keep the important Corinth Road in their hands as long as possible to hold on to the interior lines. The other Union option is to fall back to the Pittsburg Landing Road and begin to build a defensive line. This option will allow the Union commander to consolidate his forces in a tight area but will allow him little room maneuver or retreat. It will also allow the Rebels to move closer to the Landing before meeting any determined resistance. Also, importantly, because there is no option to build breastworks in this scenario there will be little added protection to the Union infantry awaiting the Rebel advance.
Holding as much ground as possible is the better of these two options. By forcing the Rebel army to fight over every hex all the way to the Landing you will drain their army of manpower, time, and supplies. Meanwhile the Union army will be reinforced heavily and the battlefield losses will be replenished while the Confederate losses are permanent. Be sure to hold positions along the three main north-south roads and to keep small forces guarding your flanks against the Rebel cavalry.
![]()
General Notes on the Confederate Forces:
The Confederate Army is divided into four corps in this battle.
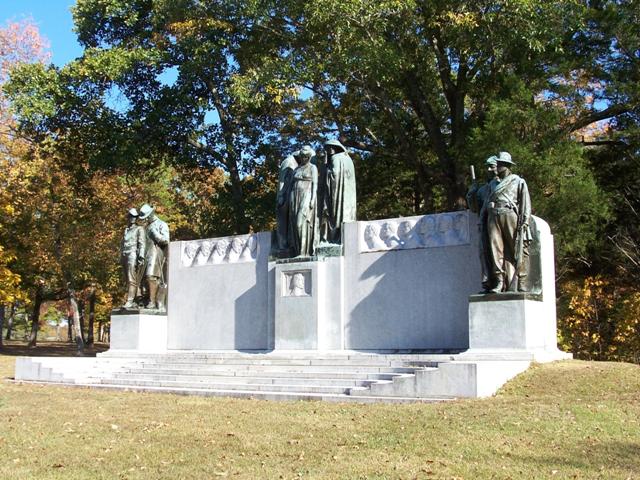
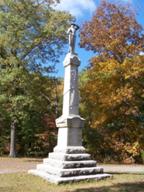
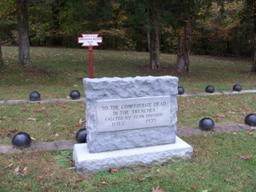
The United Daughters of the Confederacy’s Confederate Memorial at Hex (42, 41) – located just beside the Hornet’s Nest (background) this monument was built to symbolize the tragedy of the Battle of Shiloh for the Confederate Army. Lady Victory is seen handing the laurels of victory over to two caped figures representing Night and Death in the center. On either end of the monument are four figures - each representing a branch of the Confederate service. On the left are figures representing the cavalry and officer corps – they are seen searching in vain for open ground to fight on and without any idea of what is going on around them. The figures on the right represent the artillery and infantry and both look forward as they go to meet the enemy. The stone reliefs on the monument symbolize the advance and retreat of the Confederate army. On the right of the monument there are numerous heads held high moving toward the left (Pittsburg Landing). On the left of the monument the heads are faced the opposite direction in a downcast manner and are fewer in number, retreating. A bust of Johnston is visible just below the statues in the center.
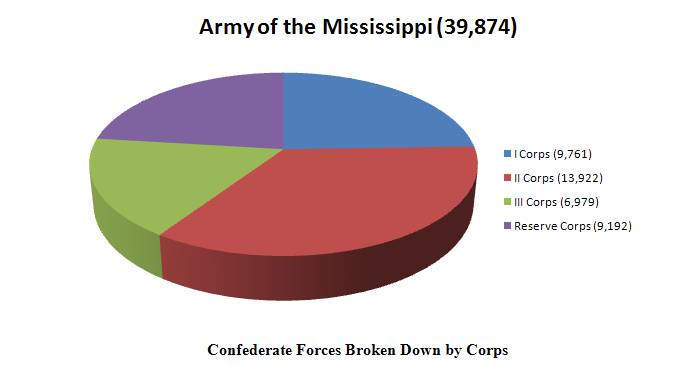
39,874 – Army of the Mississippi (Gen. Albert S. Johnston, Gen. Pierre Beauregard) AQ 3.31
The Army of the Mississippi contains 117 cannon in 47 sections with 2,925 artillerymen, 4,097 cavalrymen and 32,852 infantrymen.
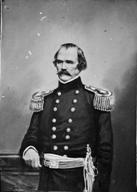
Gen. Albert S. Johnston and the Johnston Death Marker at Hex (47, 52) – it was here Johnston was fatally wounded while inspecting the fighting at the front. The Sarah Bell Cotton field is visible through the trees to the left.
9,761 – I Corps (Maj. Gen. Leonidas Polk) AQ 3.16
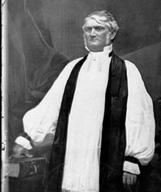
Maj. Gen. Leonidas Polk and the Arkansas State Monument at Hex (43, 43) – many southern states had little money for building monuments after the war and this was only one of two Confederate state monuments built at Shiloh (the other state being Alabama). Texas would add a monument in 1964 and Tennessee in 2006.
The I Corps contains two divisions with 24 cannon in 9 sections with 600 artillerymen. It also fields 665 cavalrymen and 8,496 infantrymen.
4,996 – Clark’s Division (Brig. Gen. Charles Clark) AQ 3.25
2,791 – 1st Brigade (Col. Robert Russell) AQ 3
2,205 – 2nd Brigade (Brig. Gen. Alexander Stewart) AQ 3.5
4,785 – Cheatham’s Division (Brig Gen. Benjamin Cheatham) AQ 3.09
1,868 – 1st Brigade (Brig. Gen. Bushrod Johnson) AQ 3.25
1,521 – 2nd Brigade (Col. William Stephens) AQ 3
1,396 – Unattached AQ 3
13,922 – II Corps (Maj. Gen. Braxton Bragg) AQ 3.22
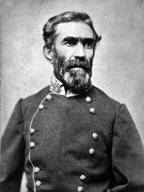
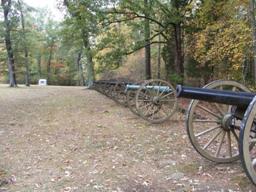
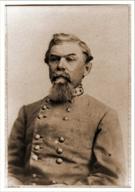
Maj. Gen. Braxton Bragg and Ruggles’s Cannon at Hex (35, 45) – when repeated charges across Duncan Field failed Bragg ordered a massive concentration of artillery to start blasting away the Union defenders in the Sunken Road and Hornet’s Nest.
Bragg’s Corps contains 1,056 cavalrymen and 12,216 infantrymen. It also fields 26 cannon in 10 sections with 650 artillerymen.
6,889 – Ruggles’s Division (Brig. Gen. Daniel Ruggles) AQ 3.29
2,408 – 1st Brigade (Col. Randall Gibson) AQ 3.67
1,628 – 2nd Brigade (Brig. Gen. Patton Anderson) AQ 3
2,625 – 3rd Brigade (Col. Preston Pond) AQ 3
228 – Unattached AQ 4
6,984 – Withers’s Division (Brig. Gen. Jones Withers) AQ 3.13
2,195 – 1st Brigade (Brig. Gen. Adley Gladden) AQ 3.2
1,805 – 2nd Brigade (Brig. Gen. James Chalmers) AQ 2.8
2,314 – 3rd Brigade (Brig. Gen. John K. Jackson) AQ 3.25
670 – Unattached AQ 4
6,979 – III Corps (Maj. Gen. William Hardee) AQ 3.17

Maj. Gen. William Hardee and Reconnoitering Road at Hex (22, 57) – Hardee’s men divided along either side of the Corinth-Pittsburg Road with about half of the Corps going forward against Prentiss and the other half moving against Sherman.
The III Corps contains 24 cannon in 11 sections with 600 artillerymen. The Corps also contains 83 cavalrymen and 6,296 infantrymen.
1,929 – 1st Brigade (Brig. Gen. Thomas Hindman) AQ 3.5
2,782 – 2nd Brigade (Brig. Gen. Patrick Cleburne) AQ 3.17
2,268 – 3rd Brigade (Brig. Gen. S.A.M. Wood) AQ 3
9,192 – Reserve Corps (Brig. Gen. John Breckinridge) AQ 3.68
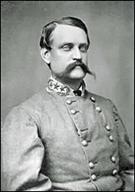
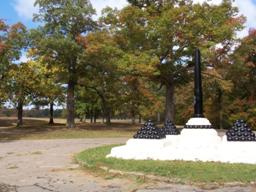
Brig. Gen. John Breckinridge and a Confederate Burial Trench at Hex (25, 56) – The Confederate dead on the battlefield were buried in mass graves, like the one pictured, after the battle. There were eight mass graves discovered but only five marked when the National Park was established. The reason three were left unmarked has never been explained. The three missing mass graves are a frequent topic at the park headquarters but there is little chance of stumbling across them today.
The Reserve Corps is composed of 43 cannon in 17 sections with 1,075 artillerymen. It also contains 2,293 cavalrymen and 5,824 infantrymen.
2,733 – 1st Brigade (Col. Robert Trabue) AQ 3.5
1,723 – 2nd Brigade (Brig. Gen. John Bowen) AQ 4.2
2,293 – 3rd Brigade (Col. William Statham) AQ 2.83
2,443 – Unattached AQ 5
The Good and the Bad of it:
Top Rated Division (Corps): Breckinridge’s Corps AQ 3.68
Lowest Rated Division (Corps): Cheatham’s Division AQ 3.09
Top Rated Three Brigades: Bowen’s Brigade AQ 4.2
Gibson’s Brigade AQ 3.67
Trabue’s Brigade AQ 3.5
Lowest Rated Brigade: Chalmers’s Brigade AQ 2.8

General Notes on the Union Forces:
The Union force is composed of two armies under Grant and Buell. Together the armies field 129 cannon in 43 sections manned by 3,225 artillerymen. The armies also contain 2,144 cavalrymen and 62,250 infantrymen. The overall AQ of the two armies is a 2.68 out of 5.
Grant’s Last Line of Defense at Hex (54, 31) – Grant established a final line of reformed soldiers along the Pittsburg Landing Road at nightfall. These men were aided by the two gunboats in the river and a battery of siege guns brought along to bombard Corinth after Grant advanced southward.
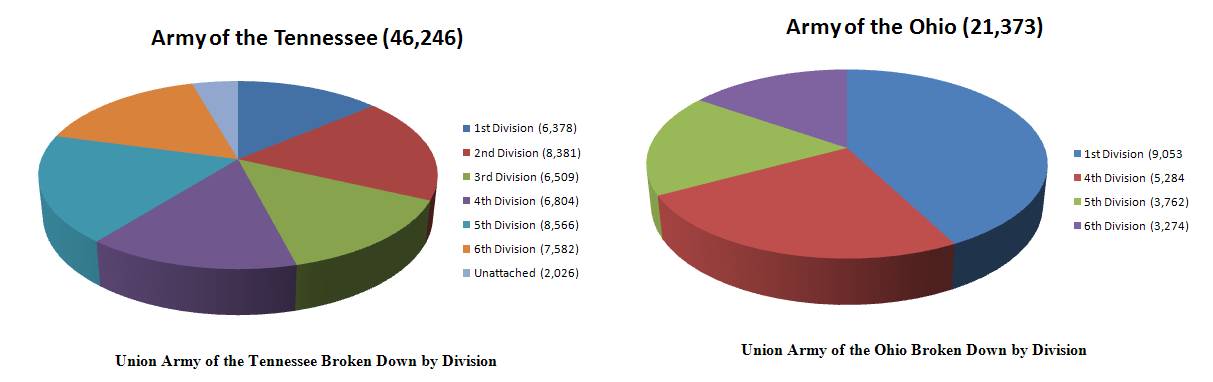
46,246 – Army of the Tennessee (Maj. Gen. Ulysses S. Grant) AQ 2.70
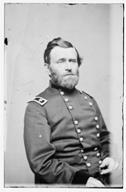
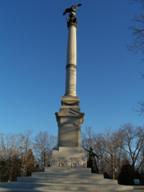
Maj. Gen. Ulysses S. Grant and the Iowa Monument at Hex (53, 31) – built to commemorate the Iowa soldiers in the battle of Shiloh this monument stands near the visitors center and features Lady Liberty writing on Fame’s eternal wall the brave deeds of the Iowa soldiers in this battle.
The Army of the Tennessee is composed of 113 cannon in 37 sections manned by 2,825 artillerymen. The army also contains 2,144 cavalrymen and 41,277 infantrymen.
6,378 – 1st Division (Maj. Gen. John McClernand) AQ 2.93
2,493 – 1st Brigade (Col. Abraham Hare) AQ 2.75
1,514 – 2nd Brigade (Col. Carroll Marsh) AQ 3
1,717 – 3rd Brigade (Col. Julius Raith) AQ 3
654 – Unattached AQ 3
8,381 – 2nd Division (Brig. Gen. W.H.L. Wallace) AQ 3
1,804 – 1st Brigade (Col. James Tuttle) AQ 3.25
2,296 – 2nd Brigade (Brig. Gen. John McArthur) AQ 3.2
3,637 – 3rd Brigade (Col. Thomas Sweeney) AQ 2.67
644 – Unattached AQ 3
6,509 – 3rd Division (Maj. Gen. Lew Wallace) AQ 2.64
1,998 – 1st Brigade (Col. Morgan L. Smith) AQ 2.67
1,812 – 2nd Brigade (Col. John Thayer) AQ 2.67
1,840 – 3rd Brigade (Col. Charles Whittlesey) AQ 2.33
859 – Unattached AQ 3
6,804 – 4th Division (Brig. Gen. Stephen Hurlbut) AQ 2.75
2,323 – 1st Brigade (Col. Nelson Williams) AQ 2.75
2,533 – 2nd Briagde (Col. James Veatch) AQ 2.5
1,548 – 3rd Brigade (Brig. Gen. Jacob Lauman) AQ 3
400 – Unattached
8,566 – 5th Division (Brig. Gen. William Sherman) AQ 2.43
2,080 – 1st Brigade (Col. John McDowell) AQ 2.67
1,882 – 2nd Brigade (Col. David Stuart) AQ 2.67
1,833 – 3rd Brigade (Col. Jesse Hildebrand) AQ 2
2,077 – 4th Brigade (Col. Ralph Buckland) AQ 2
694 – Unattached AQ 3
7,582 – 6th Division (Brig. Gen. Benjamin Prentiss) AQ 2.36
2,790 – 1st Brigade (Col. Everett Peabody) AQ 2.5
1,774 – 2nd Brigade (Col. Madison Miller) AQ 2
3,018 – Unattached AQ 2.5
2,026 – Unattached AQ 2
21,373 – Army of the Ohio (Maj. Gen. Don Carlos Buell) AQ 2.65
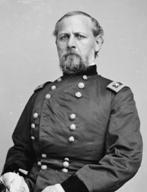
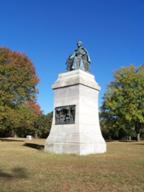
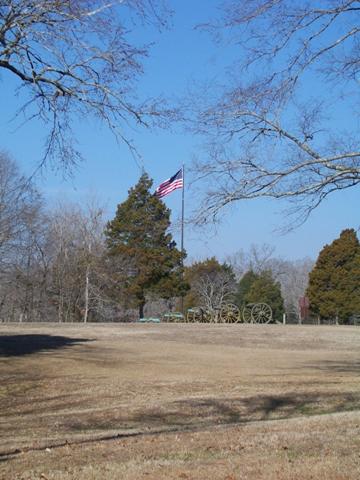
Maj. Gen. Don Carlos Buell and the Illinois Monument at Hex (29, 44) – this monument sits in the middle of where Sherman’s division fought on the first morning of the battle near the Shiloh Church and in Woolf Field.
The Army of the Ohio has 20,973 infantrymen along with 400 artillerymen in 6 sections with 16 cannon.
9,053 – 2nd Division (Brig. Gen. Alexander McCook) AQ 2.79
3,111 – 4th Brigade (Brig. Gen. Lovell Rousseau) AQ 3
2,718 – 5th Brigade (Col. Edward Kirk) AQ 2.75
3,074 – 6th Brigade (Col. William Gibson) AQ 2.5
150 – Unattached
5,284 – 4th Division (Brig. Gen. William Nelson) AQ 2.89
1,876 – 10th Brigade (Col. Jacob Ammen) AQ 3
1,656 – 19th Brigade (Col. William Hazen) AQ 3
1,752 – 22nd Brigade (Col. Sanders Bruce) AQ 2.67
3,762 – 5th Division (Brig. Gen. Thomas Crittenden) AQ 2.43
2,167 – 11th Brigade (Brig. Gen. Jeremiah Boyle) AQ 2.25
1,345 – 14th Brigade (Col. William S. Smith) AQ 2.67
250 – Unattached
3,274 – 6th Division (Brig. Gen. Thomas Wood) AQ 2.29
1,434 – 20th Brigade (Brig. Gen. James Garfield) AQ 2
1,840 – 21st Brigade (Col. George Wagner) AQ 2.5
The Good and the Bad of it:
Top Rated Division: W.H.L. Walalce’s Division AQ 3
Lowest Rated Division: Wood’s Division AQ 2.29
Top Rated Three Brigades: Tuttle’s Brigade AQ 3.25
McArthur’s Brigade AQ 3.2
Rousseau’s Brigade AQ 3
Lowest Rated Brigade: Garfield’s Brigade AQ 2
Comparing the Forces:
The Union armies will post an AQ of 2.68 to the Confederates 3.31. The number of cannons is nearly equal for both sides though the Federals having a few more. The Confederates though will have a large advantage in cavalry quality and numbers. But on such a battlefield as this it will do them little good except to be dismounted and used as infantry in many cases. The Federals will enjoy the use of two gunboats that can be used to lob shells toward the Confederate lines with indirect fire.
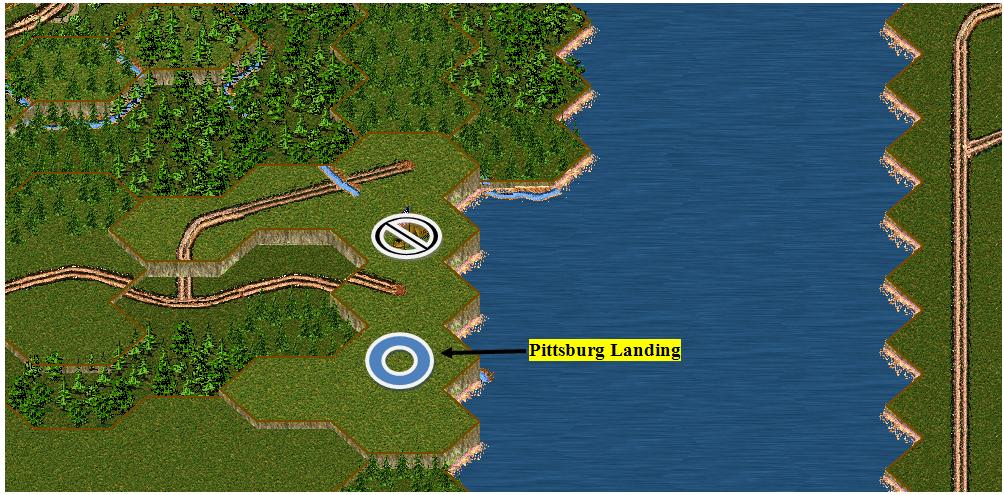
Pittsburg Landing is WHERE!?
Although the game has the Pittsburg Landing hex on the map at coordinates (56, 31) the ACTUAL coordinates of it are at (56, 33)! Although the one hex says it is a source of Union reinforcements it is obviously some Yankee trick on the poor Rebs. The actual hex is two spaces south and unmarked. If you take the hex correctly labeled on the board you will find Union transports still unloading men just south of your position. If you make it to Pittsburg Landing be sure to capture the correct hex at (56, 33). There is no protective distance for the Landing either. Your men will not rout automatically if Union reinforcements appear at the Landing if you are nearby.
The Trap at the Landing:
If the Confederates do manage to secure the area around the landing this is nearly a guaranteed Union surrender. It is not necessary to even hold the hex at (56, 33) if you have enough men and cannon to immediately isolate incoming units. If the Union player places his men into the trap they will be unable to fire from the hex if it contains over 1,000 men. But the enemy can fire INTO that hex that has more than 1,000 men. For the Union player this would mean having his men enter the board in column, becoming immediately isolated in place and unable to return fire. This would prompt about any opponent to holler for mercy. If you do need to hold the hex at (56, 33) for some reason be aware of the two Union gunboats that will be firing with all their guns to sweep you back from the landing.
CONFEDERATE STRATEGY IN A CAMPAIGN
For those fighting this battle as part of a CAMPAIGN you should remember the Club Rule 5.1.4 which states that you CAN remove troops from the board in campaign games! If you pound the stuffing out of Grant on the first day but fail to take the landing you can withdraw off of the map before the second day without penalty. It may not be the most honorable thing to do but it can guarantee you a victory (assuming you are ahead in VP’s) if you are unsure of your ability to hold out against Buell on day two.
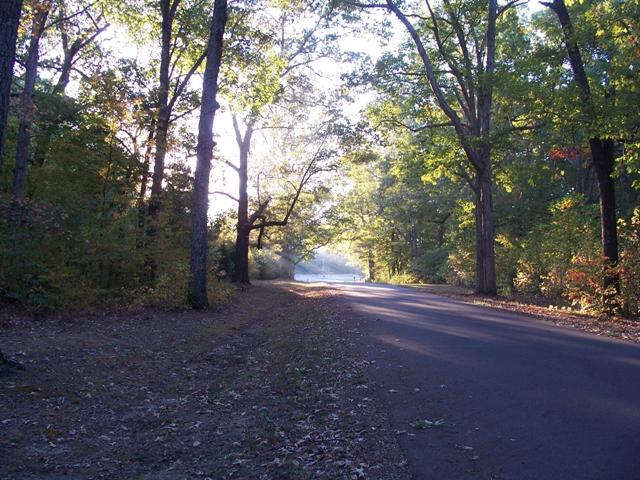
Peabody Road at Sunrise on Hex (36, 49) – Union regiments of Prentiss’s Division in the woods to the right and the field ahead (Spain Field) were met on this ground early on the 6th and were driven back across this road in confusion.
Technical Assistance and Special Thanks to:
Hampus Drott
Army of the Mississippi
Kennon Whitehead
Army of the Mississippi
Created and Written By:
Blake Strickler
Army of the Mississippi
Questions or Comments?