 Napoleonic Wargame CLub
Napoleonic Wargame CLub
Newsletter EDITION 05 - January, 1999
Publisher: Pierre Desruisseaux, Secretary of State
Editor : Chris Wattie, 1st KGL Hussars, British Army
Topics:
The Front Page: General information and articles
Dispatches: News from the four armies
Front and Centre: Promotions, Medals and Battle News
Strategy and Tactics
New Scenarios, games and updates
Next Issue
The Front Page
RHINE TAVERN BURNS IN MYSTERIOUS MIDNIGHT BLAZE
The Rhine Tavern, the fabled hostelry of the Napoleonic Wargames Club and site of countless revelries, boasting matches and impromptu duels, burned down in a mysterious midnight fire last month. As teary eyed club members gathered in shock and sorrow around the charred timbers and still-smoking embers, rumours began circulating about the cause of the tragic blaze. Distraught regulars were seen weeping over the ruins of the wine cellar and Maj. Francisco (Paco) Palomo had to be restrained by his brother officers from diving in to the rubble in search of a particularly fine Amontillado he insisted might still be drinkable. Witnesses gave conflicting reports about the comings and goings in the early morning hours before the conflagration, but French sources indicated that two officers in scarlet were seen just before the flames consumed the tavern reeling drunkenly around the courtyard outside waving what appeared to be Congreve rockets. British Army commander Arthur Wellesley categorically denied any involvement by British officers in the fire, pointing out that the flames also spread to the nearby Allied officers’ mess which was also consumed by the inferno. "Besides," Gen. Wellesley sniffed disdainfully. "Wattie and Flynn were so squiffy they couldn’t’ve lit a cheroot, let alone a Congreve." The proprietors of the Rhine Tavern quickly set up a makeshift replacement under canvas, steadfastly enduring complaints about the slow service, lack of decor and "those appalling cookies." Our very own secretary of state, the Hon. Pierre Desruisseaux, soon got to the heart of the mystery. The server for our sister club, the InfoLogo Wargames Club, withdrew their support for the club and hence our beloved Rhine Tavern. The resulting fire is now believed to have been set for insurance purposes. But Desruisseaux said the tavern is being rebuilt even now and a new wine cellar is being, err, liberated from chateaux and country manors across Europe. "Things are back on track," said the secretary of state. "By the second quarter of the year things will get back to normal."
TALONSOFT BOUGHT UP BY SOFTWARE GIANT
By James Fudge
Computer Games Online
<http://www.cdmag.com/Home/home.html>
Take-Two Interactive has acquired wargame publisher TalonSoft in a swap for Take-Two common stock for outstanding capital stock of TalonSoft. The deal was announced in a press release issued Dec. 24. Founded by John Davidson and Jim Rose in 1995, TalonSoft has developed over fifteen wargame titles, including the famous Battleground series. TalonSoft's most recent releases are The Operational Art of War, released earlier this year, West Front, released a few weeks ago, and Chickamauga, which has just been finished. Anthony Williams, Chief Operating Officer of Take-Two, said TalonSoft president Jim Rose and CEO John Davidson will join Take-Two after the buyout. "Take-Two's strong worldwide distribution will broaden the reach of our award-winning products and allow us to focus on what we do best, which is make great games," said Rose.
TalonSoft is currently working on several new titles, including an expansion for West Front, a scenario disk and a follow-on game for The Operational Art of War, a Battle of Britain game developed by noted designer Gary Grigsby, and two new campaign games covering the American Civil War and the Napoleonic wars. No word yet on how or whether the merger with Take Two will affect TalonSoft's publishing schedule.
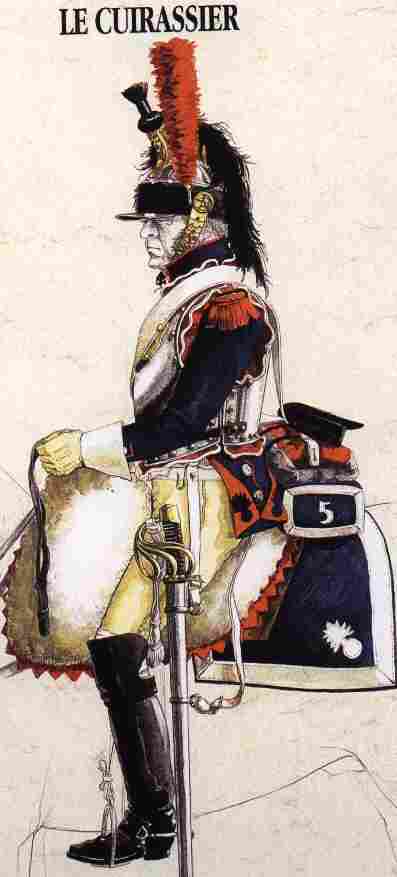
DESCRIPTION OF THE CUIRASSIERS OF THE FRENCH IMPERIAL GUARDS
The following article appeared in an American newspaper circa 1815, describing the units that formed the backbone of the French heavy cavalry:
The cuirassiers of the French Imperial guards are all arrayed in armour. The front cuirass is in the form of a pigeon's breast, so as to effectually turn off a musket shot, though fired ever so near, owing to its being kept so bright, the back cuirass is made to fit the back; they weigh from 9 lb. To 11 lb. Each, according to the size of the man, and are stuffed inside with a pad; they fit on with a kind of fish-scaled clasp, and are put off and on in an instant; they have helmets the same as our horse guards, straight long swords, and pistols, but no carbines; and if there is a good horse to be found they are sure to have it. They are all chosen men, must be five feet seven French (above six feet English), have served in three campaigns, 12 years in the service, and of good character.
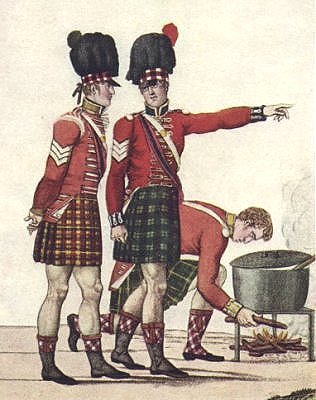
Another period newspaper had an editorial approach somewhat less complimentary to the French in its reports from Flanders. Under the headline:
FIRST BRITISH REPORTS OF HEROICS AT WATERLOO
In the late memorable battles, many acts of individual courage and heroism were displayed. The following have come to our knowledge: -- Lieutenant Riddoch, of the 44th regiment, which suffered severely in the action of the 16th, had a rencontre, single-handed, with a French cavalry officer, who furiously attacked and attempted to cut him down. The gallant Lieutenant, a powerful young man, in his turn became the assailant, and soon made the Frenchman "bite the dust." Having thus killed his man, he mounted his horse, with which he rejoined the remains of his regiment. With a handful of men, Colonel Macdonald, of the Guards, defended a chateau, a post of great importance at them moment against an attacking force of ten times the number, after the castle which he occupied was set on fire, and compelled the enemy to retire.
Colonel Colquhit, of the same regiment, with great intrepidy and presence of mind, seizes and threw out a shell from a hollow square, into which it
had just fallen, and thereby saved the lives of many gallant men. The conduct of the French, in the treatment of their prisoners, is spoken of as most disgraceful to their military character. In the action of the 18th, Ensign Graham, of the 73rd regiment, being stunned and knocked down in the field, was taken prisoner, and immediately conducted to Bonaparte, who among other questions, tauntingly asked him, if he thought he could overtake the British army before they embarked for England. He then ordered Graham to be sent to the rear of the French troops, where he was stript, left almost naked, and compelled to carry some pioneer's tools -- He contrived, however, in the course of the night to make his escape to the Prussian army, and he is now at Brussels.
Dispatches
British Army
The forces of his Britannic Majesty George III have swelled to record numbers in the past two months. We have welcomed so many new recruits to our ranks that it has proven necessary to split our five divisions up into brigades and promote our most worthy officers to command them. In addition, the load of resulting staff work has necessitated creation of a full-time army staff corps, namely our trusty and well-beloved Cols. Wattie and Flynn.
Congratulations to our newly minted Captain Jane Weightman, who takes over the elite cavalry division from Col. Wattie, and to Lt. Colin Gaskell, who now commands the 2nd Infantry Division, and last but not least to Lt. Mark Trowbridge, commander of the 4th Infantry Division.
And a round of drinks as well to their new brigade commanders: Lts. Anders Danell, Jonathon Paul, Daniel Tansley, and Stephen Miles.
God Save the King!
A. Wellesley
British Army C.O.
Armee du Nord
There have been several changes in the Armee recently and a large number of new recruits - a heart felt welcome to you all - France needs officers willing to fight for justice & liberty.
The Armee command structure changed in a major way with a new III Corps Commander - Major Guerri. There have also been a number of Divisional positions filled: In I Corps Capt. Davis - 1st Div.; Lt. Chaytor - 2nd Div.
In II Corps: Lt. Wayne Crotts - 5th Div Lt. Steve Davenport - 6th Div Lt. Brian Dow - Corps Cavalry. The inoculation of these officer will help a smoother running of the Armee.
I remain Sir,
Col. Stewart Macintyre
L’Armee du Nord
Armee du Rhine
Things have been fairly quiet recently in l'Armee du Rhine, most of our elite force is either out fighting in the Fall Tourney or catching up on some R&R at the local Tavern in preparation for the Winter campaigns.
My esteemed VIII Corps Commander Lt.Col Gary Shively has yet another Major Victory over the Allied forces at Waterloo, whilst several training exercises have been reported finished.
I am delighted to announce that the Officers of ADR now have more active games in progress than any other Army in the NWC, we are in very good shape Gentleman to take us in to a prosperous and victorious Winter.
It is with great pride that I announce the promotion of Lt. Hedly Norrish to Corps Commander IV Corps. Lt. Norrish will be assuming his post immediately. To Lt. Norrish, a hearty welcome to the general staff.
A special congratulations is extended to Prime Minister Steve Peluso, CiC French Armies, on his promotion to General de Brigade and Secretary of War Ray Panfil on his promotion to Lt. Col. A case of champagne has been sent to the Officers mess on behalf of Col. Brewitt to assist in the celebration of this event.
Congratulations & thank you to all active Officers in l'Armee du Rhine, keep picking fights with the Allies & score up those Victories.
Colonel Jon Brewitt
Commanding l'Armee`du Rhine
Russian Army:
As you can see its been a busy couple of months on the eastern front. First of all I would like to thank 1st Lt Paul Cramer for all his help as aide-du-camp through the month. The Russian army is shapeing out well.Congradulations to Carlos Nalda for his first major victory and John Underwood for another Major Victory. I think everyone is doing really well and are involved in at least 1 or 2 games.
Victory and Draws:
Major John Underwood major victory against 2nd Lt Gilbert Ocampo
1st Lt Carlos Nalda major victory against Captian Tod Davis
Major Mark Doggett drew against Col. Stewart Macintyre
1st Lt Paul Cramer drew agianst Captain Wayne Crotts
Maj. Mark Doggett
Russian Army
Prussian Army
The Prussian army has seen 4 promotions. Mike Gjerde made Major, Sam Orlando made Captain, Mauro Crestini made Major and I made Lt. Col.
Two Prussian Summer tourny games ended. Major Crestini beat me at Blucher's Bluff and Lt. Takacs beat Brevet Capt. Brandsma. The Prussians have lost each time so I am going to adjust the scenario to make it balanced. The second round will start this month with another new scenario from NIR. This time the Cavalry Clash in an attempt to hold the Utitsa mound! All of the cavalry at Borodino will be used and all of the horse guns as well! A dream come true for Marshal Murat!
We saw heated action from Captain Sam Orlando as he beat me at the Death in the Fleches sceanrio which we played in 3 days! All files for the most part were sent via ICQ. A real quick way to get a game over real fast!
I will now be awarding medals for those who win a Major victory over a French opponent who is defeated at a scenario that I would rate as balanced against the Allies. I will be putting out a list of the scenarios so you can go for the gold!
Also of notable mention is Lt. John "Bucking for Promotion" Egan who submitted some hints on play for the Allies! We appreciate his efforts and will be looking forward to more entries from him.
All Allied officers are welcome to visit the Allied discussion board to see my tactical tips I will updating each month. I received a lot of good feedback from officers on last month's entries.
Updates to the website were a special history section for each brigade and medal icons by each member that has been awarded with the Military medal!
Keep up the good work Allies!
LTC Peters
Front And Centre
Medals
French:
Lt-Col. Joe Gregory the Legion of Honour;
Lt. Yves Michael Medaille Militaire;
Col. Peluso - La Medaille Militaire & the Order of the Iron Crown;
Capt. Davis - The Medaille Militaire & the Order of the Iron Crown
Maj. Palomo - Medaille Militaire for past victories over the Allies; Order of the Iron Cross for picking up the task of training new I Corps recruits.
Maj. Masson - Medaille Militaire for past victories over the Allies
Maj. Guerri - Medaille Militaire for past victories over the Allies
British:
Col. Wattie - Military Merit Cross.
Col Flynn - Military Merit Cross.
Russian:
Military Merit Cross
2nd Lt Karl Schneider
Major Mark Doggett
2nd Lt Bryan Corkill
Major John Underwood
Grand Star Cross
1st Lt Jim Woods
1st Lt Carlos Nalda
Order of Franz Joseph
1st Lt Paul Cramer
Empire Military Medal
1st Lt Carlos Nalda
Prussian: None reported.
Promotions
French:
Salvadore Alemany, Cmdr Imperial Guard, to Colonel;
Gary Shively CC VIII Corps - Promoted to Colonel;
Lt. Jeffery Dohrman IV Corps - Promoted to Captain
Jon Brewitt CoA ADR - Promoted to Colonel.
Toni Andreasson, Aide de Camp to Col. Brewitt - Promoted to Lt. Colonel
Brett Trevalyan is promoted to Major.
British:
Andrew Flynn, 23rd Royal Welsh Fusiliers, to Colonel.
Chris Wattie, 1st KGL Hussars, to Colonel.
Jane Weightman, Inniskilling Dragoons to Captain.
Russian:
Mark Doggett to Major
Paul Cramer to 1st Lt
Carlos Nalda to 1st Lt
John Underwood to Major
Jim Woods to 1st Lt
Prussian:
(See Army Note)
Game News
SPW028 ANDREW FLYNN over STEVE PELUSO BGW 10 Allied Major
SPW032 MAURO CRESTINI over SERGIO GUERRI BGW NWC01 Allied Major
SPW040 FRANCISCO PALOMO over STEPHEN MILES BGW 7 French Minor
SPW042 GARY SHIVELY over JAMES WOODS BGW NAP VIC French Major
SPW047 ANDY CHAYTOR over GIL OCAMPO BGW 4 French Major
SPR037 CARLOS NALDA over TODD DAVIS NiR 17 Allied Major
SPR038 STEVE DAVENPORT over SEBASTIAN STEWART NiR 8 French Minor
SPR042 ANDREW FLYNN over JOHN COTTER NiR 2 Allied Major
SPR043 MAURO CRESTINI over SERGIO GUERRI NiR 14 Allied Major
SPR045 TODD DAVIS over GIL OCAMPO NiR 16 French Major
SPR011 SALVADOR ALEMANY over COLIN GASKELL NiR 7 French Major
SPP008 SALVADOR ALEMANY over STEVE TAKACS PTW 3 French Major
SPP018 YVES MICHEL over SAM ORLANDO PTW 3 French Major
SPP019 TODD DAVIS over STEVE MILES PTW 9 French Major
SPP025 BILL PETERS over GARY SHIVELY PTW 25 ALLIED MINOR
MPP001 FRANCISCO PALOMO & BEN BRANDON tied BILL PETERS & MAURO
CRESTINI PTW 25 Draw
MPR002 MICHAEL GJERDE & BILL PETERS over STEVE PELUSO & EINAR MASSON NiR
7 ALLIED MAJ.
Strategy & Tactics
THE THIN RED LINE
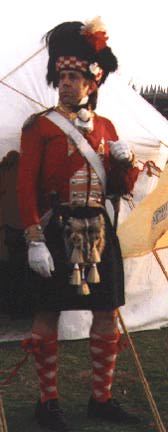
By Mark Trowbridge
73rd Highlanders Regt.
So, you`ve enrolled in the British Army and now you want to prove yourself in battle against the more numerous (and somewhat cocky) Frenchmen. If your battlefield of choice is Waterloo, then you`ve come to the right place. Hopefully this article will enlighten you as to how to defend successfully with the ragtag Allied Army until our Prussian friends arrive.
You may ask what my credentials are? Well, I`m lowly Lt Mark Trowbridge (73rd Highlanders, 1st Division). I`ve only fought one battle in the NWC club..against Col Mark Adams (V Corps) but it was a major Allied Victory after 24 turns. Huzzah! For those of you who don`t know, I put together the Unofficial BGW Site about two and half years ago and my enthusiasm for the BG series is still going strong! I now playtest for John Tiller. (BG Series designer)
On to the important bit!
I’ve heard from Allied Command that the French players seem to be favouring large-scale attacks against the Allied right flank so that’s what we’ll deal with here. (That’s the left hand side as you look at the map for those who maybe confused). This strategy of breaking the 3rd Dutch-Belgian Division, swinging around the allied flank and then hammering against the British II Corps can be extremely successful, there’s plenty of room for manoeuvre on the left - it’s also good cavalry ground and its the opposite side of the field from where the Prussians arrive.
Remember its not always important to go for VP hexes. A wise Frenchmen can break the Allied flank and then take VP areas as he sees fit once the Allies are routed.
So what can the Allied commander do to prevent this onslaught? Here are my humble suggestions:
1) Immediately shift the entire 3rd Dutch-Belgian Division to the area L’Estraye - Cambrai Farm. Preferably place your front line along the stream but with skirmishers from the light battalions deployed forward to Braine L`Alleud and on the road network. The latter will act as a tripwire should the French probe toward this flank. Keep your forward-deployed battalions in line formation (for max firepower) but remember to have at least a battalion or two from each brigade kept in reserve to act as a counter-attacking force should the enemy break through. Finally, keep both brigades in command/control whenever possible. These two brigades are very likely to rout quickly if disordered and acting independently.
2) Move the 3rd and 5th Cavalry brigades (1200+ troopers) into supporting positions but not on the front line. The II Corps and the 3rd D-B’s will need cav support to match the French cavalry that will undoubtedly accompany any enemy flanking move. With aggressive deployment of your cavalry you will be able to unnerve your opponent by slowing down his attack, forcing him to form square, bringing up his own cavalry etc. Anything that delays the enemy attack should be encouraged.
3) Ensure you have adequate artillery support on the high ground running from Mesnil Farm almost down to Hougoumont. 4 batteries should be enough for the job, with a horse artillery battery in reserve who can immediately deploy forward, unlimber and strengthen a threatened sector of the front. There’s nothing more annoying to a French commander than having his infantry columns suddenly threatened by a horse arty battery that came out of nowhere.
4) Keep at least half of the Brunswickers as a reserve to bolster both the 3rd Dutch-Belgians and the Brit II Corps should the French break through. Go for real defence in depth!!
Follow the above four points to the letter and you will have accomplished this:
An Allied Army fighting on interior lines (no longer strung out over 3-4 miles) allowing any enemy breakthrough to be quickly counter-attacked by all arms. Imagine your army with a tripwire perimeter that can dynamically shrink or expand depending on local conditions.
If you can keep this perimeter well defended for 20+ turns then the Prussians will arrive and the French commander will have little chance of being victorious.
Deploy all forces with reserves - here’s what I mean: Keep one battalion from each brigade a few hexes to the rear in column formation, one brigade from each Corps as a reserve (where permitting i.e. in this case the Brunswickers) and ensure all defences are combined arms operations -
plenty of cavalry and artillery support.
By the nature of the ground the French are more or less forced into a wide deployment from turn one and not many players shrink this down so as it becomes manageable. I often see the Young Guard or VI Corps being dispatched to the French right with the hope that they can hold the Prussians off....no way Napoleon...you’ll need more than that. Once the Prussians arrive in numbers then the French should really have already defeated the Allies. If they haven’t then c’est la vie.
Well I hope my inane drivel has helped any new guys out there !
Good luck!
ARMY COMMAND & STRUCTURE for BEGINNERS
By Lt. John Egan
Silesian Rifle Bn., Prussian Army
The first part of a three essay series on the three armies that fought in the 100 Days Campaign
PART I
The British/Dutch Army at Waterloo:
For a beginning player, one look at the Allied Army on the field at Waterloo can induce overwhelming confusion. Here’s some tips on how to proceed with command:
Your Army Commander is Wellington. He has an unlimited hex range command modifier (small "c" on his unit icon) which is "B." That means he has 5 chances in 6 ("A" would = 6 in 6, "F"=1 in 6 etc.) on a 6 sided die roll, to pass along his command modifier to the next level of command which is Corps Command. You have two Corps Commanders; The unfortunate Prince of Orange (I don’t know why he was unfortunate but everybody calls him that) who commands I Corps and General Hill (II Corps). Like Wellington, the Corps Commanders also have unlimited range to pass on their command modifiers to the next level; Divisional Command. Here’s where your command problems become tangible.
For the Divisional Commanders to pass on their command modifier to the next lower level (Brigade Command) they must be within 4 HEXES of the Brigade commander who must then be within 2 HEXES of all his battalions. So the magic numbers here are 4 & 2. It is imperative to keep a tight command structure so that the command modifiers can be passed on to each battalion, to re-order them when they become disordered. Units become disordered sometimes when they pass through
obstructed terrain, after melee and most often, when they take casualties during an enemy fire phase. In the enemy DEFENSIVE PHASE if your unit fails a moral check (6 sided die roll based upon your battalion’s moral); Militia, which usually have a moral of "2" will disorder on any roll higher than that. Guard units, with a moral of "7" will never disorder in an enemy defensive phase. In an enemy OFFENSIVE PHASE, your units will always disorder is if they take a hit and rout if they
fail the moral check. So, Militia, will rout on a roll of "3" or more, while Guard will only rout if there are extra modifiers applied, for example, disordered units check moral with a +2 modifier, attacked in flank in another +2, so a disordered Guard unit with a moral of "7" attacked in flank will have a cumulative +4 added to the die roll. So it’s possible they can rout too.
Unlike the French Army, the British/Dutch has very few commanders to pass along modifiers. So your units do not have the resiliency of the French. Be prepared to play the game with very few of your Army’s units regaining good order in the command phase. At best, they will have only 4 chances in 6 of re-ordering: Wellington > Corps Command > Divisional Command > Brigade Command. And there only in I Corps & II Corps. All units attached to "Reserve" and "Cavalry Reserve" have only 3 chances in 6 to re-order, and then only if Wellington and the Divisional commanders in the "Reserve" pass their command checks to the Brigade commanders. Other independent outfits like Lambert’s & von Kruse’s big boppers, which operate without a division command, (their divisions are elsewhere) will re-order at best 2 chances out of 6. Keep in mind however that big units like that pack a lot of firepower even when disordered as long as they are in line formation.
STRUCTURE:
1. Don’t be in a hurry to move everything around. Wellington’s deployments can serve you as a firm base of operations for your battlefield management. Right off the bat, there’s an interesting group of units in your center which you should try to not move until in desperate need. They are Lambert’s 10th British brigade, von Krause’s Nasssau Reserve Contingent, Somerset’s 1st Cavalry brigade & Ponseby’s 2nd cavalry brigade and General Colbert’s Dutch- Belgian cavalry division, which is a right fine outfit. Leave all these outfits alone for a while. This reduces the number of decisions you have to make
every turn and it insures you a nice little army group for use late in the game. Those two infantry brigades are very strong and when you use ‘em, make sure they are in line. Believe me, those 900 strength battalions pack a lot of punch when in line formation! There’s no greater satisfaction in Napoleonic wargaming than to have an 800 strength unit in line formation firing at an enemy infantry unit in column formation. Colbert’s Dutch- Belgique cavalry division, believe it or not, is the best cavalry detachment you have. The reason for this is that Colbert, as division commander, has three powerful cav brigades under his command along with two batteries of guns. The rest of the British cavalry, all 7 brigades of them, have only ONE divisional commander (Uxbridge) which means that to insure command integrity, those 7 British cav brigades need to be within 4 hexes command radius of Uxbridge in order to have a reasonable chance to re-order after a charge. The Dutch-Belgiques can operate on their own!
The Right Wing. Fight there with the skirmishers from those two D-B light battalions. Put the skirms in the chateaux, orchards and towns, where they can’t be overrun by cavalry. If your opponent wants to make a push over there; let him fight through your light troops (hold those chateaux!) and come to your 4th & 5th Hanoverians in line. Those boys don’t have much morale but they have some firepower! And they are backed up by 2 fine cavalry brigades and Pack’s 9th British brigade. Be prepared to fall back on your left. Again, you don’t have to move a lot of troops here. Trust Wellington’s deployments, play
with the cards that are dealt ‘ya and any French player foolish enough to commit major resources to a push in that area will soon have the Prussians at his back. If you have to fall back there, fall back to Mont St. Jean town & farm and make that the Main Line of Resistance (MLR).
The Center. This is more of a problem here especially with the guns deployed forward. At the first hint of an enemy push here you need to get the guns out of there before they are overrun by cavalry or else deploy infantry in front of them to prevent that.
Fight like crazy to hold La Haye Saint farm and if the enemy by-passes the farm counter attack with infantry, cavalry & horse guns which can move, unlimber & shoot all in one turn. This is the essence of combined arms attacks. Use all three forms and make sure Uxbridge is there to re-order the cav after they are spent from the charge.
The Right. The key defensive terrain here is the Hougomont complex which is one tough nut to crack. If you lose that place then the ridge behind it might well fall too although it’s not automatic. If the ridge does fall and the enemy place guns up there and proceed intelligently you are in a lot of trouble. Remember though, it’s much more difficult for the French to hold Hougomont than for you. If you lose it, counter-attack to re-take it; again making sure Uxbridge is there to personally lead the cavalry contingent. Your structure on the right is again well deployed. II Army Corps is in good position and I would try to hold them in reserve. Hill is the II Corps commander and Clinton (who begins the game in a forward position with Mitchell; get him out of there!) commands the 2nd division which is all of it. The outfit behind them is the Duke of Brunswick’s private army.
Unfortunately for you, the Duke got hisself killt at Quatre Bras so Offermans is in command which means they have at best 3 chances in 6 to re-order while units in II Corps have 4 chances. If you can, use the scenario editor to increase the strength of the 52nd Light Battalion (II Corps) to about 900. For some reason, it’s understrength.
Another key terrain feature on the right is the town of Braine ‘l Alleud whose defense is entrusted to Chasse’s 3rd D-B infantry division I Corps which is a good outfit. Hold the light battalions in reserve and break ‘em down into skirms to fight in the town.
If the enemy makes a major push here, and most French players do, these boys will need support: Brusnwick & II Corps are the logical choices. You can’t blame a French player for using two squadrons on lancers to destroy your most forward deployed battery of guns here. Be prepared for that.
Finally, you’ll probably be faced with a mechanized infantry attack, i.e. the type of assault where the French player cranks up all units, gets ‘em on the roads to close everywhere as soon as possible and attacks everywhere all at once hoping for a quick decision figuring that he’s gonna lose anyway if the attack fails and the Prussians arrive. It’s not Napoleonics but rather generic wargaming (the field could be anywhere; the units on the east front; it’s the panzerblitz mentality spawned by games with short
duration spans and quick resolutions) and it’s your choice as to whether or not you want to play against it. As wargaming goes it’s an effective attack but it’s not the kind of military movements which were customary in the 19th Century. If you’re interested in Napoleonics, look for opponents who wish to re-create the mood & movements of a Napoleonic battle rather than just win baby.
NIR Cavalerie Tactics Manual Volume 1
This is meant as an introductory manual for the use of French and Russian Cavalerie in the Talonsoft games, in particular the NIR scenarios.
My allied co-writer Colonel Wattie will be discussing Cavalerie in the Anglo-Allied games. It is divided into five parts.
I. Introduction
Cavalerie is without question one of the most enjoyable arms to use on the battlefield. There is nothing quite like a Cavalerie charge as it thunders toward the enemy. However, it is also one of the most difficult arms to control and use effectively.
This manual is an attempt to help aid beginning players in their use of the French arme blanche. In
addition, I will be discussing the ways in which Russian Cavalerie can be used to counter the French horsemen. I will be discussing usage of the Cavalerie in terms of TalonSoft games, not necessarily in their historical sense.
Remember this is a game, not quite a historical simulation, although there are of course some common denominators between the two. Perhaps the single most important maxim to remember when employing Cavalerie is L’Audace, l’audace, toujours l’audace.
II. The Basics
You have just begun a new scenario and you look out over your deployed forces. You gaze upon those brilliantly bedecked French Horsemen and you cannot resist the urge to hurl them at the enemy driving all before them. Now, please refrain from this impulse. One of the first principles of
Cavalerie usage is conservation of your mounted forces.
This is not only a wise tactical maneuver but it makes sense in TalonSoft game conditions.
Each 25 French Cavalerie troopers lost will cost you 8 VPs. That means that you would need to inflict 200 Infantry casualties vs. only 25 Cavalerie just to break even in the exchange! Now this ratio will not be reached even in the best charges, so you must prepare for the fact that you will ALWAYS come out on the losing end in straight victory point calculation no matter how many enemy soldats you sabre.
Victory then must be found through other means. This is not as much of a problem for Russian Cavalerie, in fact it is a very substantial benefit. Russian Cavalerie will only cost you 4 VP for each 25 that you lose. It is therefore advantageous to use the Russian Cavalerie to engage the French, as you almost always will come out ahead in the exchange.
Cavalerie must be broken down into squadrons. This cannot be stressed enough. Historically Cavalerie charged by squadrons, not by regiments, and adhering to this tactic when fighting a TS scenario will greatly enhance your chances of victory. The benefits of this are many and
varied:
1. Multiple squadrons reduce the amount of fire that can be directed at you. It is more preferable to have four 50 man Cav units then one 200 man unit charging if they must receive a cannon shot.
2. With your cavalerie divided up into multiple squadrons it is much easier to recover at least some of your units from disorder. In the above example, it is far better to have two of those 50 man units ready next turn with two disordered rather than hoping your one 200 unit makes its die roll.
3. A Cavalerie regiment which is divided up into squadrons can effectively block off more terrain and provide more threat zones than one large group of cavalerie. Since Infantry can not attack cavalerie, a unit of 300 cavalerie, divided up into squadrons can make life miserable for advancing infantry if they do not have cavalerie support. The cavalerie may not be strong enough to defeat the infantry, but it can force the infantry to move slowly and try and force the cavalerie back with musket fire, a very tedious process.
4. Doesn’t it just look better to have rows of Cavalerie deployed?
III. French Cavalerie
The French Cavalerie must be wielded like a rapier, not a broadsword. I have already stressed the VP discrepancy between the French and Russian cavalerie. This means that the French should only melee Russian cavalerie when they can effectively destroy it as a fighting unit. Battles of attrition should be avoided at all costs. Fortunately, you will invariably have cavalerie superiority over the Russians. You have more cavalerie and in particular, more heavy cavalerie. Don’t forget the additional 25% bonus that attacking heavy cavalerie or lanciers provide. The Russians will usually aid the French player in their use of cavalerie. Since the French will usually be attacking and the Russians are usually set in defensive positions, a Russian player will invariably use his cavalerie in local counter attacks against the advancing French units. This will leave them exposed and overextended. You should have no problems cutting them off and destroying them with ZOC. French heavy cavalerie is ideal for this role, they perform the actual thrust while you can use a few 50 man light cavalerie squadrons to block off the retreat options. You should not actively seek out Russian cavalerie by extending your units to go searching for them, be patient, they will come to you. The most difficult obstacle your cavalerie might face is the horrible terrain that is prevalent in the NIR scenarios. Except for the area around Utisa, the ground is ill suited for cavalerie. In particular the area around the Great Redoubt, which is where you are most tempted to use Cavalerie, is marked with ravines, streams, wolfpits, woods, and others obstacles which will disorder approaching cavalerie. Still, cavalerie can be used even here if a little thought is put into the charge. The French historically took the redoubt by charging through the rear of it with cavalerie. In this game too you have two convienent entry ways that are assailable. Even better is that they can be reached without exposing yourself to nasty Russian cannon fire. Reverse slopes of the hills will cover almost your whole advance. Another useful tactic in Nir games is to position your light cavalerie at the mouth of a ravine and sweep down overrunning all those pesky jaegers. Russian Infantry regiments should only be hit with your cavalerie if you can destroy them through ZOC. This is because the Russian units will almost never rout and your cavalerie will end up being ensnared amongst the disordered, but unrouted Russian regiments.
The four French Cavalerie Corps are wonderful units that can perform a myriad of functions. These are the basic building blocks of your French Cavalerie force. The I and II Reserve Corps are the largest, and III is almost always used to support Eugene and IV Corps. This leaves IV which is the smallest to act as a reserve.
In fact you have great mobility and superb command in control with these Corps, in addition to a mass of horse guns. Keep your Cavalerie Corps together if at all possible, and assign them to specific tasks. For example, have III assist Eugene, I assist V Corps, II back up I and III Corps and leave IV Corps as a reserve to be used with the Garde Cavalerie for the coup de grace.
This is only one example, there are many other options which you can choose because of the flexible nature of the French arme blanche.
The important thing to remember about the French Cavalerie in Nir is that it will almost always allow you to seize and hold the initiative. You can force the Russians to react to your moves and threats. There is nothing more intimidating that a whole Cavalerie Corps sitting behind a ridge line, this "sword of Damocles" will often cause a Russian player to panic and make mistakes. Sometimes the best use of Cavalerie is the threat of a charge and not an actual charge!
IV. Russian Cavalerie
Russian Cavalerie tactics will differ from those of the French. This is necessitated by several factors. First of all the French will usually outnumber the Russians in cavalerie strength., a large proportion of Russian cavalerie is Cossacks, the Russians will primarily be on the defensive, and finally Russian cavalerie is cheaper in terms of VP. How is a Russian officer supposed to use his cavalerie effectively? One of the great strengths of the Russian army is the large number of Cossacks which are available. Now true, they are almost useless against Infantry, as they don’t receive the x3 bonus except when charging routed infantry, but infantry still cannot melee them and they can cause massive head aches to an aggressive French commander.
The best opportunity for this is on both of the flanks. The Cossacks around Utisa and the Cossacks and light cavalerie beyond Borodino can be sent forward in dispersed squadrons to harass the French General to end of grief. It is to your advantage for the French to melee your Cossacks with his cavalerie. Remember your 2:1 VP advantage. Place your Cossacks in positions where the French will be forced to melee you and disorder his cavalerie. In some instances Cossacks can keep large contingents of French Cavalerie from every playing a part in a battle, King of the Hill is one such scenario. Cossacks can also overrun guns just as easily as any other type of cavalerie, and an unexpected attack on guns which have been left undefended can be devastating to the French, particularly moral wise. No one likes to have Cossacks running around on their flanks, and a French player may be coerced into using valuable reserves to stave off a Cossack attack real or imagined. The very thing that happened to Napoleon historically at Borodino.
The Russian Cavalerie also enjoys the advantage of being able to sit back and wait for the French to become cut up and disordered as they launch their attacks on the Russian positions. However, if you are going to charge, charge like a French beau sabreur, meaning charge in force and charge home. Don’t commit your cavalerie piecemeal, or they will be surrounded and destroyed. A charge in force can very often sweep the French back and stall their advance for a long time. You may then retreat behind the cover of your guns to reform. The Russian commander should always keep a couple regiments of Heavy cavalerie in reserve for emergency situations. The victor in Nir, more that the other games, usually is the one with the freshest reserves and having a few heavies in reserve can be crucial. This doesn’t mean throwing them forward to rout a few French brigades. Wait until the French are advancing in disorder after they have taken a position. They will be fatigued, understrengthed and out of position. A well timed charge will sweep them back allowing you to reclaim the position and making the French go through the whole bloody process all over again. It is usually best to attack the French Infantry and leave the cavalerie alone, either forcing them to attack your Cossacks or waiting until they have charged and then hitting them while they are out of position and disordered. It really gains you nothing to go out and advance in most scenarios, engaging the French Cavalerie head on, the French will come to you, that is guaranteed.
Perhaps the best tactic to use is one of the most under-appreciated attacks a cavalerie can make, the counter-charge. Well positioned Russian cavalerie can spoil that grand French Cavalerie charge, saving your infantry and leaving the French exposed to nasty artillery fire next turn.
V. Conclusion
I hope this manual helps you manage your cavalerie better in the Nir games. It is a shame to waste cavalerie uselessly because they can be better employed in so many other ways. Cavalerie must be hoarded and conserved. It should spend long moments on the battlefield in reserve. The ugly slugging matches of Nir should be left to the Infantry and Artillery. But when the time comes to use the cavalerie, it should be used with flair and audacity. Don’t commit your units piecemeal. don’t forget about your flanks, and don’t take any cannon shots that aren’t necessary. Proper cavalerie usage takes practice, but the rewards are noticeable and very often can prove decisive.
New Scenarios and Updates
PLAYTESTING MODIFICATIONS TO BGW USING THE NEW OPTIONAL SKIRMISHER RULES
By Maj. Gary Shively
Playtesting continues with the five teams that have volunteered their time to test my modifications to BGW. One team has even reached beyond half-way in the scenario Napoleon's Victory in less than 3 weeks. So far, none of the playtesters reports any strange occurrences.
My team is playing Napoleon's Victory using the new skirmisher rules that can be found at the "Maxim and Principles of War" section under the heading "New Infantry Rules" Numbers 1 and 1a. With these rules, the game has been transformed into a fast moving struggle where manoeuvre is entirely possible.
No longer can either side deploy row after row of skirmishers to impede your advance and subject your formed battalions to phase after phase of cannon fire.
Gone is the need to expose expensive cavalry to massed gunfire to clear away this hordes of light troops. A very un-Napoleonic procedure!
Missing is the fear that retreat can be cut off by a mere 25 to 75 men.
Each player has now to think about how he manoeuvres. With a one-line-deep protection of skirmishers, he has only one turn to save his formed battalions from other infantry. He can no longer use skirmishers to put his formed battalions and artillery to put enemy cavalry out of charging range.
They cannot be used as an inexpensive scout any longer. It was not their role in the 19th Century. That role belonged to the cavalry.
If a player has made a tactical mistake, he pays the price. Gone is the tactic of "delay by skirmisher". This will cause many to change the way they play the game. They are now forced to act more in accordance with 19th Century principles.
Playing by these rules, the skirmisher is no longer King of the Battleground games. Cavalry casualties are lessened, and they allowed to function in their true role. Light units are no long broken completely into fragments, and now actually take part in battle as formed units.
In the end, each player must be a better general. The battle is much more fluid, and casualties much less severe for the player who uses combined arms doctrine and ensures that he cannot be cut off by Zones of Control by keeping troops within supporting distance of each other.
The movement phases are much shorter because there are many fewer pieces to move, decreasing turnaround time, and giving you more time for other games....and we all want that. In this humble writers opinion, using these rules is as close as you can get to realism without having to dictate your orders to a Chief of Staff and waiting to see how they are carried out.
So, give em' a try. You'll feel much more like a general and much less like a manipulator of the game rules.
Next Issue
In order to keep the quality of the newsletter up, I’ve decided to publish every second month in part part because of the nightmarish RL workload of your humble editor. The next issue will combine January and February news and should hit the web site by March 1.
Submissions to the newsletter are always welcome. Questions, comments, notices of lawsuits or challenges to duels as a result of contents of this newsletter should be addressed to the editor: Col. Chris Wattie c/o watties@interlog.com.